
To add a new user to an event, start by choosing an event (1). Next you can fill out;
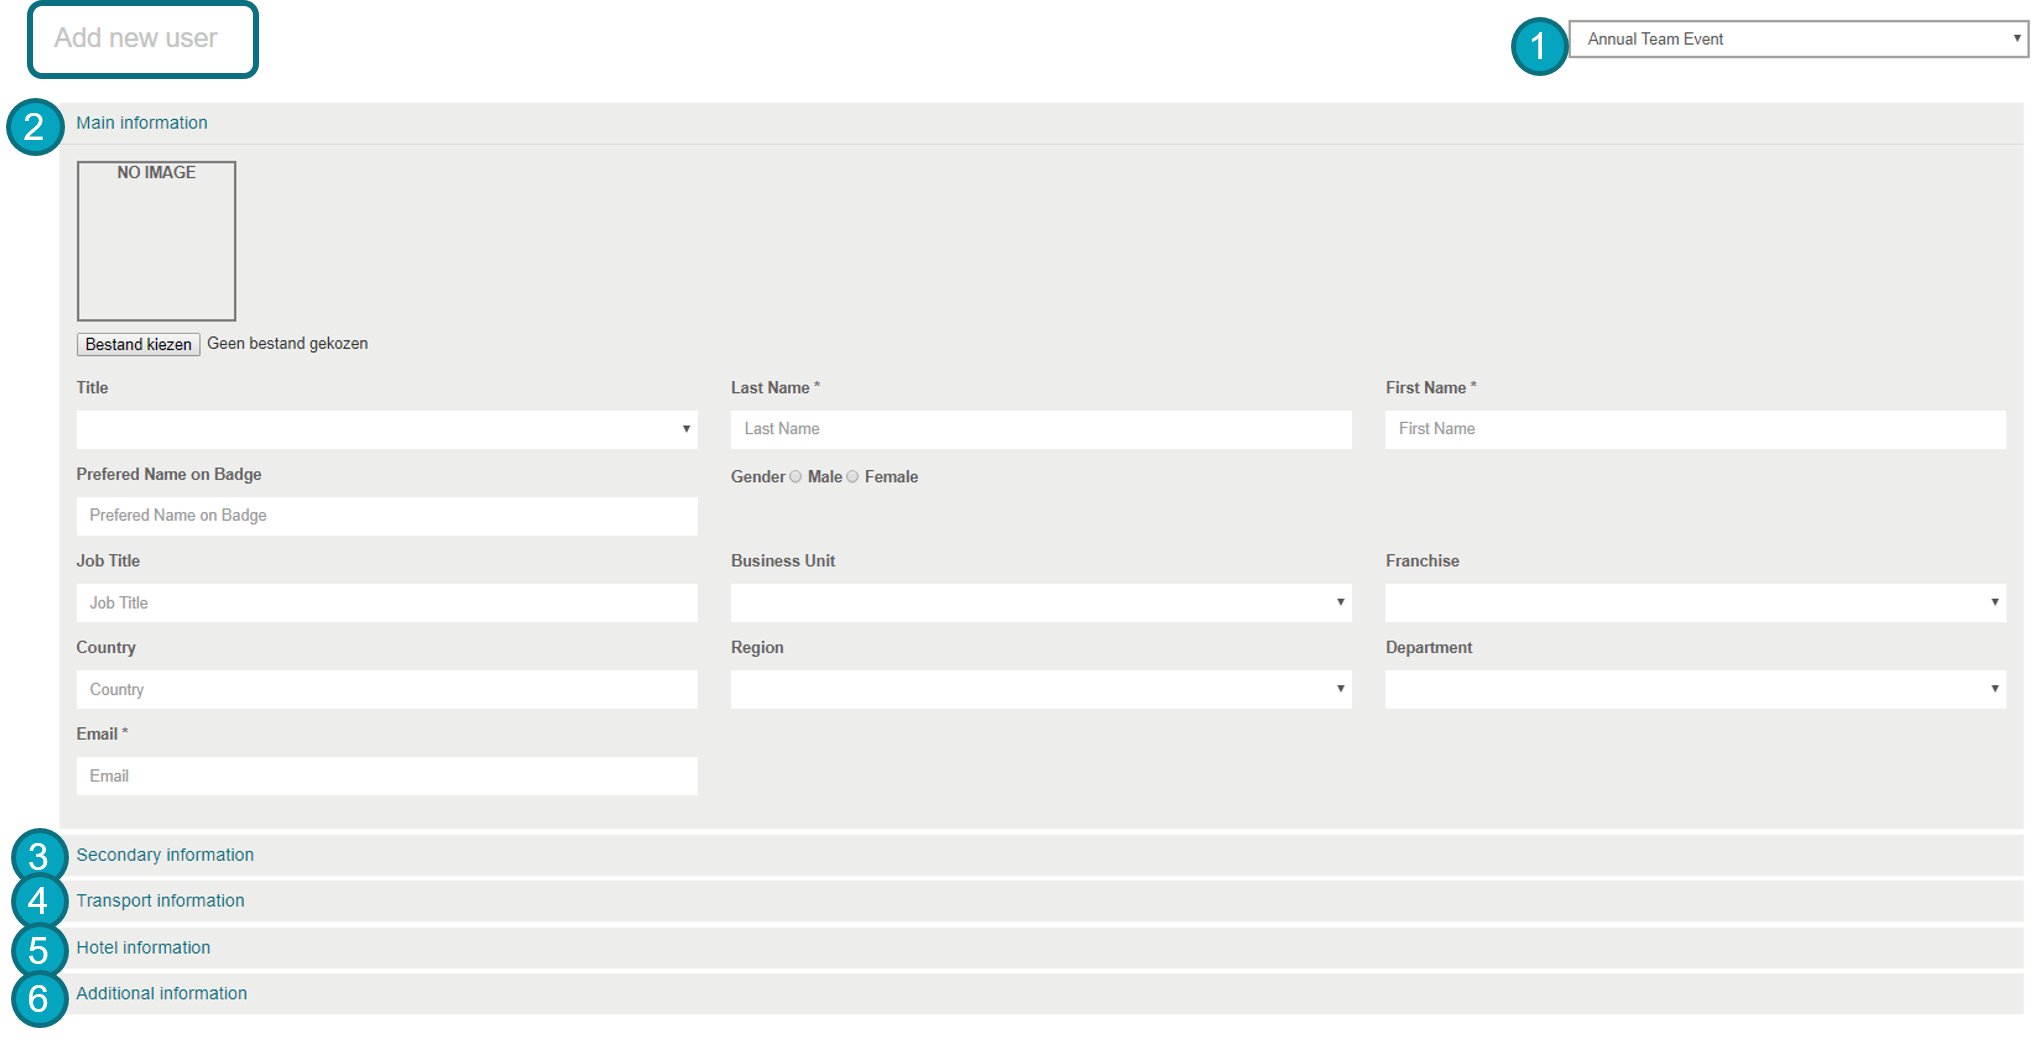
- main information
- secondary information
- transport information
- hotel information
- additional information
1. Main information
This information can be found in the Event App under ‘Profile’.
Fill out some main information;
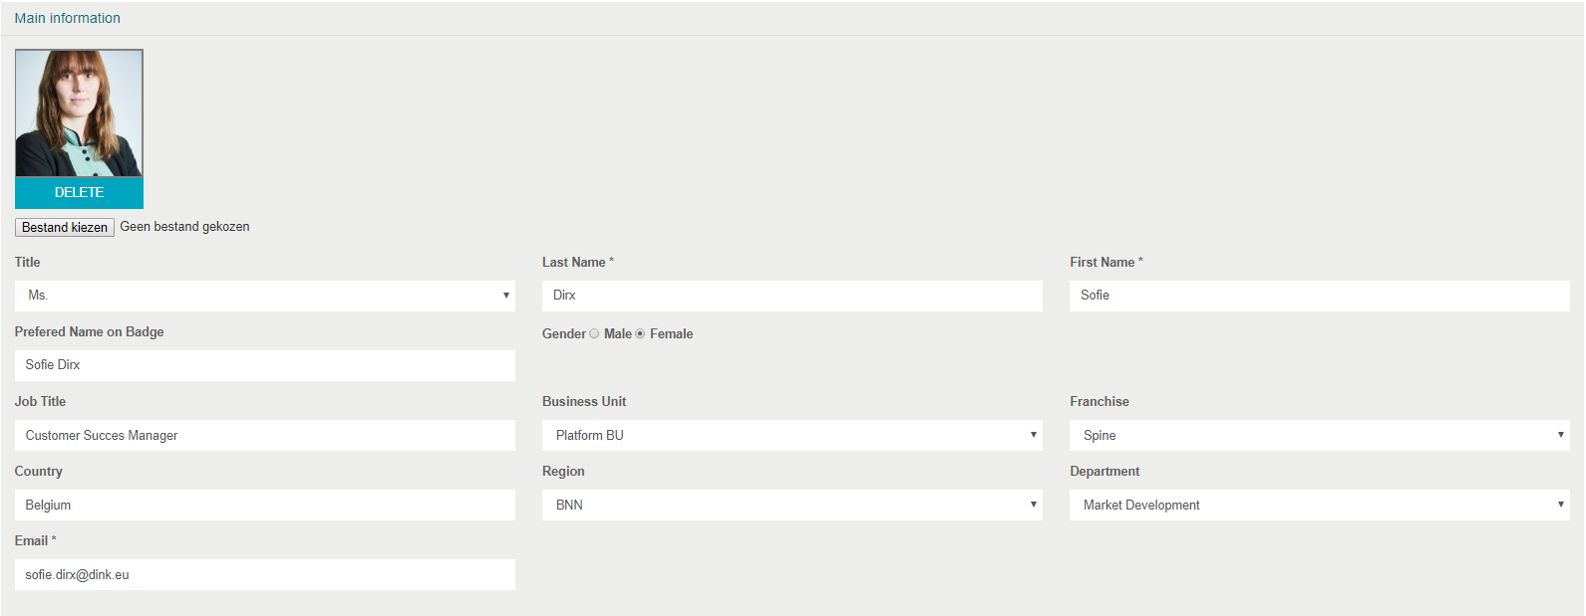
- Picture
- Title
- Last Name
- First Name
- Preferred Name on Badge
- Gender
- Job Title
- Business Unit
- Franchise
- Country
- Region
- Department
2. Secondary information
This information can be found in the Event App under ‘Profile’.
Fill out some secondary information;
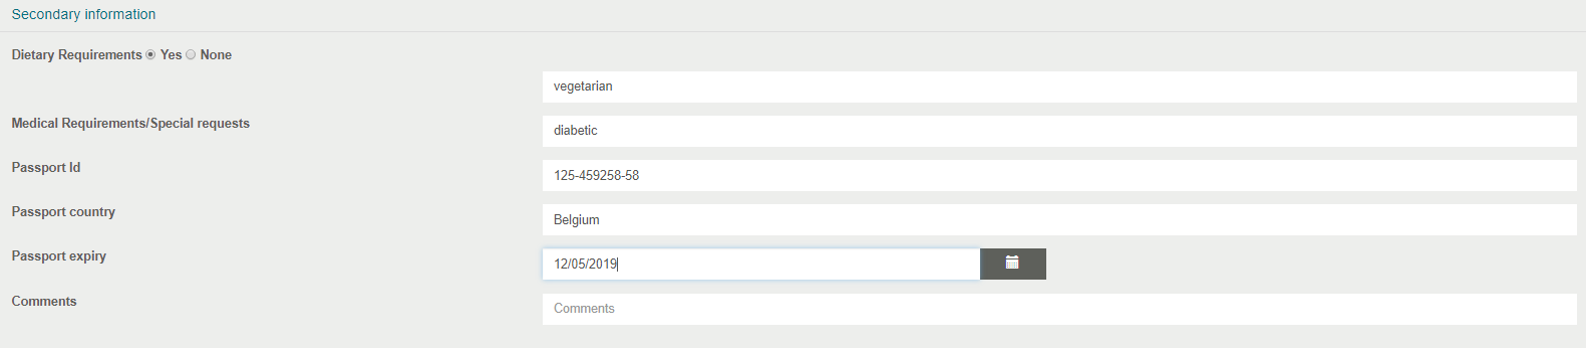
- Dietary Requirements
- Medical Requirements
- Passport Id
- Passport country
- Passport expiry
- Comments
3. Transport information
Fill out transport information;
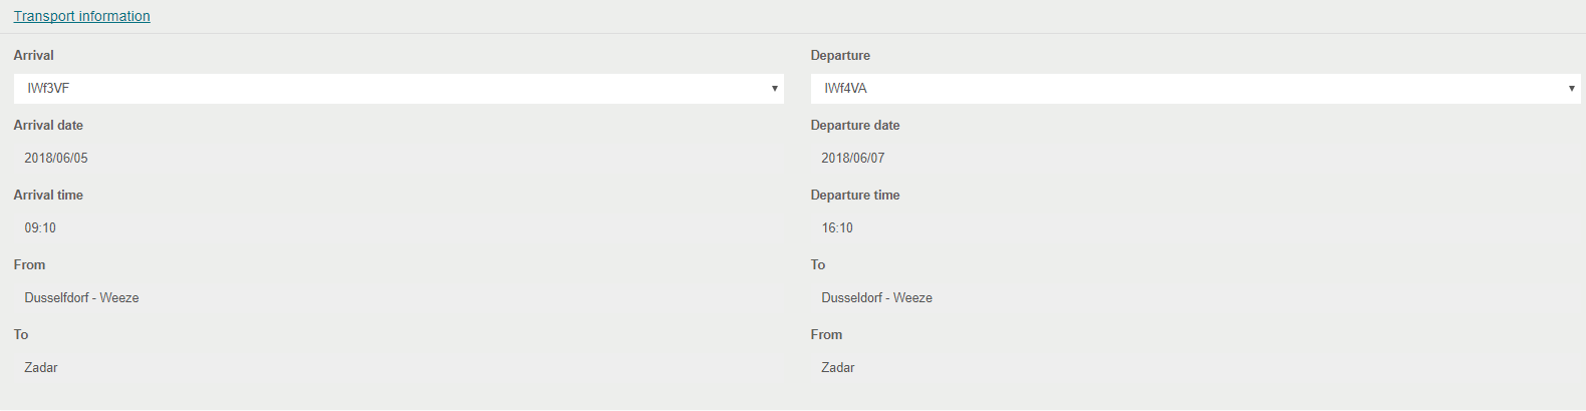
- Arrival/Departure
- Date
- Time
- From/To
4. Hotel information
Fill out hotel information;

- Hotel
- Room
- Check-in date
- Nights
- Last Night
5. Additional information
To add some information that is specific for a certain event, use the field Additional Information. For instance, when you want to know if your users want to share a room and with whom.
You can also add multiple additional fields in term of key-value pair. This means you need to provide a name and a value (both textual) that describes the user. For instance, you would like to provide information about your user’s T-Shirt size. You could add a new field, with Name ‘T-Shirt Size’ and Value ‘S’ or ‘M’. In the mobile app, it will be displayed ad “T-Shirt Size: S”.

Comments